Mac OS X / AudioTron Setup Instructions
This procedure describes how to setup Mac OS X (version 10.2 or higher) for use as a file server for the AudioTron. You can find another description of this process on the Mac OS X - Audiotron Page. I have included screen snapshots to make it easier to follow.
Prerequsites
You need to have administration rights on your Mac in order to set things up. You should also have some MP3 files in a folder called Music under the user account that you are using for the AudioTron. If you are using an existing account on your Mac for the AudioTron, I suggest putting a few MP3 files in that folder to begin with so you can be sure that your configuration is correct before moving a bunch of files there.
Also, you will need to be able to access the AudioTron's web interface. For this, I recommend either Netscape 7 or the Mozilla browser as they render the AudioTron's web pages the best (IE 5.x works OK, Safari Beta 1.0 (v51) has some issues still). You will need to know the IP address of the AudioTron, so I highly recommend setting a Static IP address for your AudioTron. This is done from the AudioTron's front panel using the steps below:
- Turn on power to the AudioTron from the rear switch.
- Press the Power/Standby button on the front panel.
- If the AudioTron hangs waiting for network, press the Stop button.
- Press the Options button.
- Use the Knob to scroll to the "Configure DHCP" selection and press the Knob.
- Turn the Knob to select "Disable", then click the Knob.
- Enter network settings for an IP address, and subnet mask. In my case, I used 192.168.1.254 for the IP address and 255.255.255.0 for the subnet mask. These settings depend on your network setup. Refer to your ISP's or your router's documentation to determine the correct settings for you.
If you want to access Internet radio stations via TurtleRadio, you will need to access the AudioTron's web interface to enter a DNS server IP address. Refer to your ISP's documentation to determine the correct settings for you. Once a DNS server IP address has been entered, you can enable Internet Radio from the TurtleRadio page on the AudioTron.
File Server Settings
Follow the steps below to setup your Mac as a files server for your AudioTron.
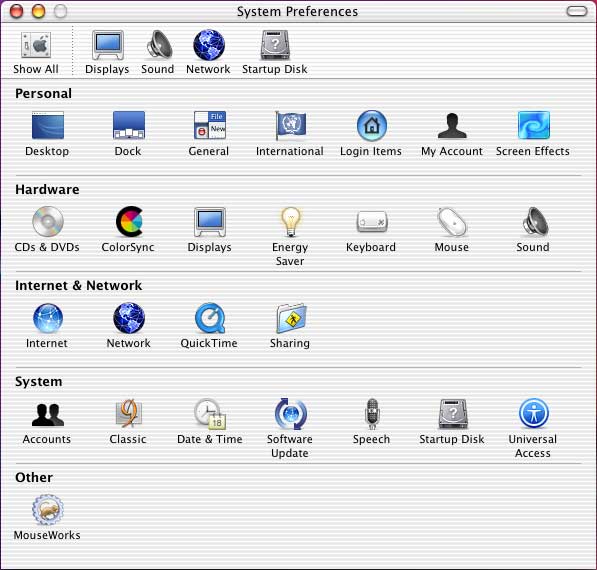
Step 1: Open System Preferences (from the Dock)
This is where you will enable Windows File Sharing and setup an account for the AudioTron to access.
Step 2: Click on Sharing
You will see the Sharing panel similar to the one below:
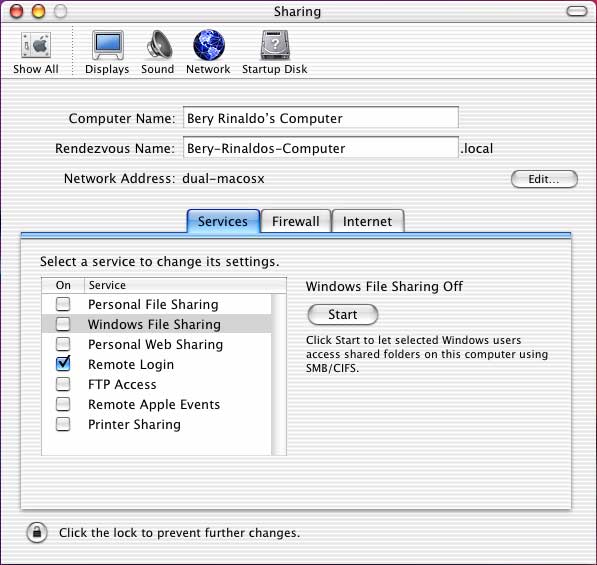
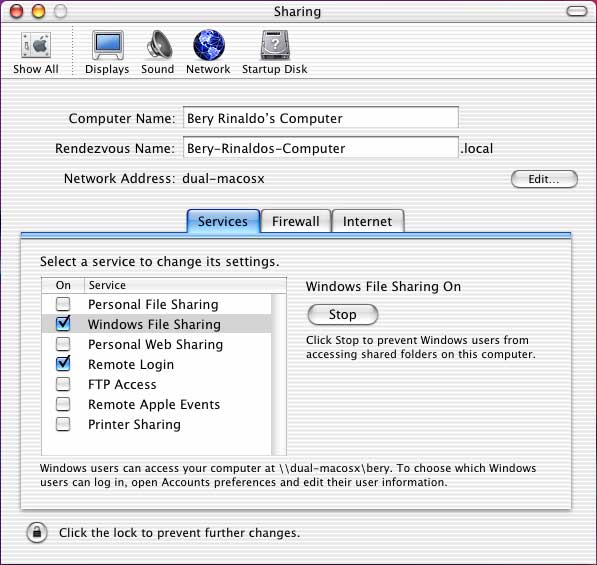
Step 3: Enable Windows File Sharing
Click on the Windows File Sharing line and either click the checkbox to the left, or click the Start button on the right. When complete, the checkbox will remain checked as shown below:
Step 4: Setup an account for the AudioTron
Click on the Show All button in the upper left of the System Preferences. Then click on the Accounts button. The following panel will be seen:
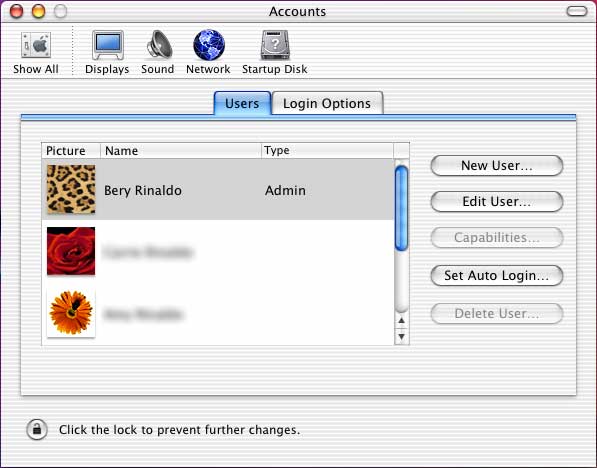 To use an existing account, select the account and click the Edit User... button. To create a new account, click on the New User... button.
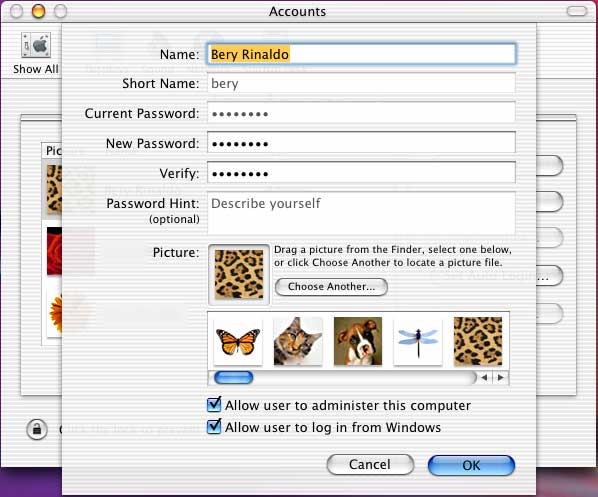
Step 5: Allow user to login from Windows
In the user account panel, make sure that Allow user to login from Windows checkbox is on as show below:
Step 6: Enter the username and password on the AudioTron
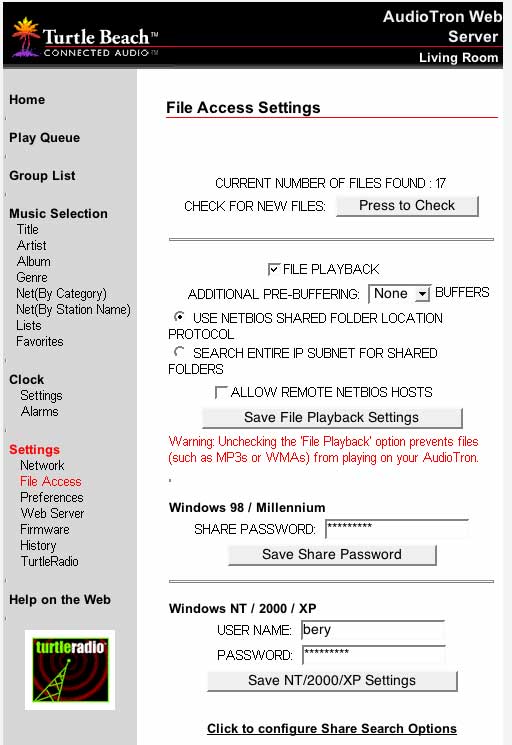
Open up your web browser to the AudioTron's web interface. Go to File Access from the Settings section on the lower left side of the page. You will need to enter your AudioTron's administrator username and password (default admin:admin) to access this page. Enter your short Mac username and password in the Windows NT/2000/XP section at the bottom of the page and click on the Save NT/2000/XP Settings button.
Step 7: Restart your Audiotron
At this point, the AudioTron should be able to access the files under the user account on the Mac. You can power off your AudioTron and then power it back up, or try the Press to Check button on the top of the AudioTron's File Access page to check for new music.
Other Tips
The following sections offer up tips that might help for your particular configuration if it is different from the basic setup above. If your question is not covered below, feel free to e-mail me at:
Another Drive or Network Mounted Volume
Use the instrctions below if you store your MP3 files on a secondary interal drive, an external drive (such as a Firewire drive), or a network mounted volume. These instructions include modifying the smb.conf file using the vi editor in a Terminal window, so if you're not comfortable with that, you'll have to look at other solutions to reconfigure Windows File Sharing for your needs.
If you've never opened Terminal before, it is an application which can be found on your man system drive under the Applications:Utilities folder. This allows you full access to the Unix command line environment. If you've never opened Terminal, then the vi editor will be new to you, too. You can do a search on vi editor on your favorite search engine, or have a look at these links that I found after a search:
Before beginning, make sure there is a folder called Music in the top-level folder of your mounted volume and be sure that there are some MP3 files under that folder.
Step 1: Determine the Unix (Posix) path to your disk
Open a Terminal window and type in the following command:
mount
The output may look something like this:
/dev/disk0s5 on / (local)
/dev/disk0s6 on /Volumes/MusicDisk (local)
devfs on /dev (local)
fdesc on /dev (union)
 on /.vol (read-only)
automount -fstab [333] on /Network/Servers (automounted)
automount -static [333] on /automount (automounted)
Look for something that starts with /Volumes/ to see what is mounted. In the example above, there is a secondary internal drive called MusicDisk where the music files are stored. The important thing to note is the path /Volumes/MusicDisk in this case.
Step 2: Add an entry to the /etc/smb.conf file
You will need to use an editor to modify the smb.conf file, so you need to learn enough to get into the editor, make your change, then get back out. Here's how I did it:
- In the Terminal window, type
sudo vi /etc/smb.conf
- You will be prompted to enter your password
Password:
- In the vi editor, use the arrow keys to scroll down just past this section:
[homes]
   comment = User Home Directories
   browseable = no
   read only = no
   create mode = 0750
- Press the i key to start inserting into the file. Insert the following (replacing MusicDisk with the name of your volume):
[MusicDisk]
   path = /Volumes/MusicDisk
   public = yes
   only guest = yes
   guest ok = yes
   writable = no
   printable = no
- Press the Esc key to stop inserting text, then type ZZ (that's Shift-Z Shift-Z) to save the file and exit the editor.
Step 3: Restart Windows File Sharing
Click on the Stop button, then the Start button for Windows File Sharing from the Sharing panel of System Preferences.
Step 4: Restart your AudioTron
Power off your AudioTron and then power it back up.
AudioTron Can't Find My Mac
In the event that AudioTron cannot see the Mac, you might need to change a setting on the AudioTron's File Access page. Click on the radio button next to SEARCH ENTIRE IP SUBNET FOR SHARED FOLDERS and then click the Save File Playback Settings button. This method of searching for hosts can take slightly longer than the default method (USE NETBIOS SHARED FOLDER LOCATION PROTOCOL) but will almost always find every host on your network.
Page last modified on: Tue Jan 14 14:58:53 PST 2003